
A clipping path is a precise vector outline used in image editing to isolate specific areas of an image. This ensures that only the desired elements appear in the final output. This technique is crucial for professionals in graphic design and photography, as it allows for the manipulation of image backgrounds and the composition of more complex visuals.
Accurate and well-aligned clipping paths are essential to maintain the integrity of the image and ensure the subject stands out clearly. But what happens when you notice something is off? Specifically, when you start wondering, “Why is my clipping path inverted?”
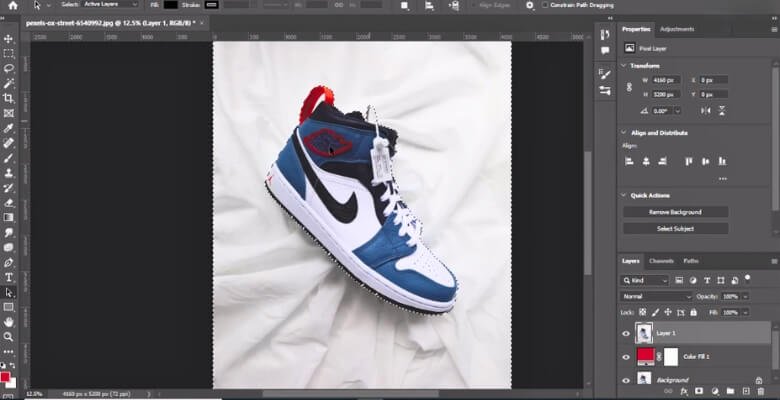
Often, this issue arises because you had “Subtract Front Shape” selected instead of “Combine Shapes” in your Paths Option Bar when creating your path. This setting reversal can lead to unexpected results where the areas you intended to include are excluded instead.
To understand how to correct this and avoid similar issues in the future, keep reading as we dive deeper into the intricacies of clipping paths and their settings.
Clipping Paths: What Are the Basics?
A clipping path is a fundamental tool in digital image editing, used to isolate specific elements within a photo. Essentially, they allow you to draw a line, or ‘path’, around the parts of an image you want to keep visible, effectively cutting out the rest. This technique is particularly popular in industries like advertising, fashion, and product photography, where precise image manipulation is crucial.

One key advantage of clipping paths is the high degree of control over image composition. You can fine-tune the object’s boundaries, ensuring that no unwanted background or surrounding elements distract from the main subject. This precision makes it invaluable for creating clean, focused images that highlight the product or subject.
To get the best results, utilizing the expertise of a reliable clipping path service provider company can be a smart choice. They bring expertise and precision to the table, ensuring your images are professionally crafted to meet your specific needs.
Whether you’re preparing a product catalog or setting up promotional materials, mastering the basics of clipping paths can greatly contribute to your project’s visual impact.
The Most Common Issues with Clipping Paths
The process of clipping paths can be challenging even for experienced artists. These tools are powerful for isolating subjects in an image, but they come with their own challenges.
Whether you’re a seasoned graphic designer or just starting out, understanding these common issues can help you avoid pitfalls and streamline your workflow. Here are a few commonly occurring problems.
- Edge Halos: Sometimes, a faint line appears around the cut-out object, creating an unwanted halo effect.
- Jagged Edges: If the path isn’t smooth, the final image might show rough, pixelated edges.
- Misalignment: The path doesn’t align perfectly with the object, leaving parts of the background visible.
- Excessive Anchor Points: Too many anchor points can make the path complicated and difficult to adjust.
- Incomplete Paths: Paths that don’t fully enclose an area can result in incomplete isolation of the subject.
- Incorrect Feathering: Applying too much or too small feathers can blur the edges inappropriately, ruining the sharpness.
Each of these issues can affect your final image quality. By paying attention to these details and practicing your technique, you can create cleaner, more professional results with clipping paths.
Why is My Clipping Path Inverted?
You may have encountered an inverted path when working with clipping paths in image editing. The path you’ve created seems to do the opposite of what you intended, which includes and excludes areas you wish to keep. But, why does this happen? Here are a few common reasons we’ve identified:

Incorrect Path Direction
When creating a clipping path, the direction in which you draw the path is crucial. Image editing software uses the path direction to determine what should be included and excluded from the final selection.
If you draw the path in a clockwise direction when it should have been counterclockwise (or vice versa), the software interprets it as the opposite of what you intended, resulting in an inverted clipping path.
To correct this, you can redraw the path in the correct direction or use the software’s tools to reverse the path direction.
Selection Mode
Image editing software offers different selection modes for clipping paths, such as “Combine Shapes” and “Subtract Front Shape.” Selecting the wrong mode can lead to an inverted clipping path.
For example, if you accidentally choose “Subtract Front Shape” instead of “Combine Shapes,” the software will subtract the path area from the image instead of including it, resulting in an inverted selection.
To fix this, ensure you have selected the correct mode before creating or editing the clipping path.
Layer Order
The order of layers in your image editing software can affect clipping paths. If the layer containing the clipping path is below the layer you are trying to clip, the path may appear inverted.
To resolve this, adjust the layer order so that the path layer is above the layer you want to clip. This ensures that the clipping path is applied correctly, without inversion.
Path Complexity
Clipping paths that are overly complex, with multiple intersections, overlapping segments, or intricate shapes, can sometimes confuse the software. When software encounters such complexity, it may incorrectly interpret the path, leading to an inverted result.
To address this, consider simplifying the path by breaking it down into smaller, more manageable segments. This can help the software understand the intended clipping area and reduce inversion likelihood.
Software Glitch
Software glitches or bugs can cause unexpected behavior, including inverted clipping paths. If you suspect that a software glitch is causing the issue, try updating your software to the latest version.
Alternatively, restarting the program or resetting your preferences may also resolve the problem. If the issue persists, consider contacting the software’s support team for further assistance.
User Error
In some cases, an inverted clipping path may simply be the result of a mistake or oversight on the part of the user. For example, selecting the wrong options or settings when creating or editing a clipping path can lead to inversion.
To avoid this, double-check your work and ensure that you have selected the correct settings and options for your clipping path. Taking the time to review your work can help prevent errors and ensure that your clipping paths behave as expected.
Masking Effects
When using masking in conjunction with a clipping path, the interaction between the two can sometimes cause unexpected results, including inversion. This can happen if the mask is applied before or after the clipping path, or if the mask settings are not compatible with the clipping path.
To resolve this, adjust the mask settings or the order in which the mask and clipping path are applied, ensuring they work together seamlessly.
Anti-aliasing
Anti-aliasing is a technique used to smooth the edges of a selection, creating a more natural-looking transition between selected and unselected areas. However, anti-aliasing can sometimes interfere with clipping paths, causing inversion. To address this, consider turning off anti-aliasing or adjusting its settings to see if that resolves the inversion issue.
An inverted clipping path can result from a variety of factors, including path direction, selection modes, layer order, path complexity, software glitches, user errors, masking effects, and anti-aliasing.
These key reasons can save you a lot of frustration when it comes to inverted clipping paths. Additionally, the multiple-clipping path technique might also influence how individual paths interact within your image. Each path must be correctly configured to ensure the desired outcome. With a bit of troubleshooting, you can master image manipulation and achieve the precise visual results you need.
How to Fix an Inverted Clipping Path?
The process of dealing with an inverted clipping path can be frustrating, but fixing it is usually straightforward. Here’s a step-by-step guide to correct an inverted clipping path in your image editing software.
Step 1: Check Path Direction
Start by checking your clipping path direction. Select the path using the appropriate tool in your software and examine the direction indicator. If it’s not in the desired direction, you can easily reverse it using the software’s path editing tools.
Step 2: Adjust the Selection Mode
Next, ensure that you’ve selected the correct selection mode for your clipping path. If you accidentally chose “Subtract Front Shape” instead of “Combine Shapes,” for example, simply switch to the correct mode to invert the path.
Step 3: Layer Order
Check the layer order in your image editing software. If the layer containing the clipping path is below the layer you want to remove, the path may appear inverted. Adjust the layer order so that the path layer is above the layer you’re clipping to resolve this issue.
Step 4: Simplify Path
If your clipping path is overly complex, consider simplifying it. Break down the path into smaller segments or remove unnecessary anchor points to make it easier for the software to interpret correctly.
Step 5: Update Software
Sometimes, a software glitch causes an inverted clipping path. Ensure that your software is up to date and consider restarting the program to see if that resolves the issue.
By following these steps, you should be able to quickly and effectively fix an inverted clipping path in your image editing software. In this way, you can continue working on your project uninterrupted.
FAQs About Why is My Clipping Path Inverted?
If you’re struggling with inverted clipping paths in Photoshop, you’re not alone. Here are some common questions and answers to help you navigate this issue:
How Do I Reverse a Clipping Path in Photoshop?
To reverse a clipping path in Photoshop, simply select the path using the Path Selection tool, then press Ctrl+Shift+i on a PC or Command+Shift+i on a Mac to invert it.
How Do You Invert a Clipping Mask in Photoshop?
To invert a clipping mask in Photoshop, select the mask in the Layers panel, then use the keyboard shortcut Command+I on Mac or Ctrl+I on Windows to reverse it.
What is an Inverted Mask in Photoshop?
Inverting a mask in Photoshop means masked regions become unmasked, and unmasked regions become masked. This can be useful for refining selections or creating special effects.
How Do I Make My Clipping Path Appear Inverted when Pasted?
When you paste a clipping path into an existing document in Photoshop, the orientation of the path can sometimes change, resulting in an inverted appearance. To fix this, try dragging and dropping the path into the existing document and then using the Transform tool to rotate or flip it as needed.
How Can I Avoid Creating Inverted Clipping Paths in Photoshop?
To avoid creating inverted clipping paths in Photoshop, pay attention to the direction in which you draw your paths and select the correct path operation mode. Additionally, double-check the layer order in your document to ensure the masking path is applied correctly.
Why is My Inverted Clipping Path Affecting Other Layers in Photoshop?
If your inverted clipping path affects other layers in Photoshop, check the layer order and clipping path settings. Ensure that the clipping path is applied only to the intended layer and that it does not affect other layers in your document.
End Notes
The issue of inverted clipping paths can be frustrating, but understanding the common causes and solutions can help you troubleshoot and correct them effectively.
Remember to check the direction of your path, select the correct selection mode, and adjust the layer order if necessary. If your path is overly complex, simplify it to improve accuracy. Additionally, keeping your software up to date can prevent glitches that may cause inversion.
By following these tips, you can avoid the headache of dealing with an inverted clipping path and ensure that your image editing workflow remains smooth and efficient. So, the next time you ask yourself, “Why is my clipping path inverted?” you’ll know what to do.