
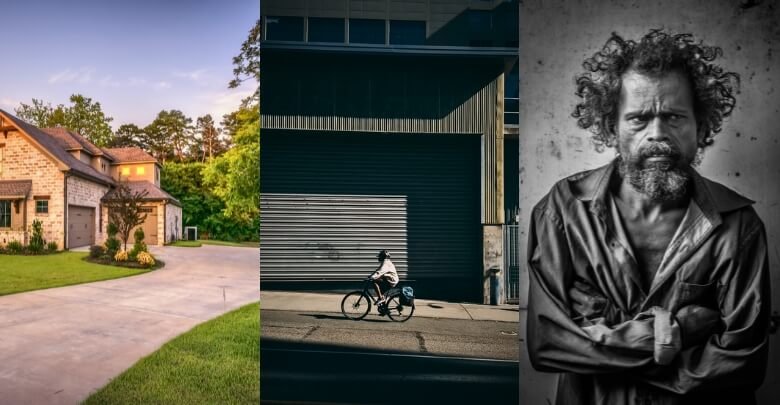
High Dynamic Range (HDR) technology dramatically enhances photos and videos by balancing light and dark areas to create a more vibrant and detailed image. This feature is especially beneficial in situations where you capture scenes with contrasting lighting.
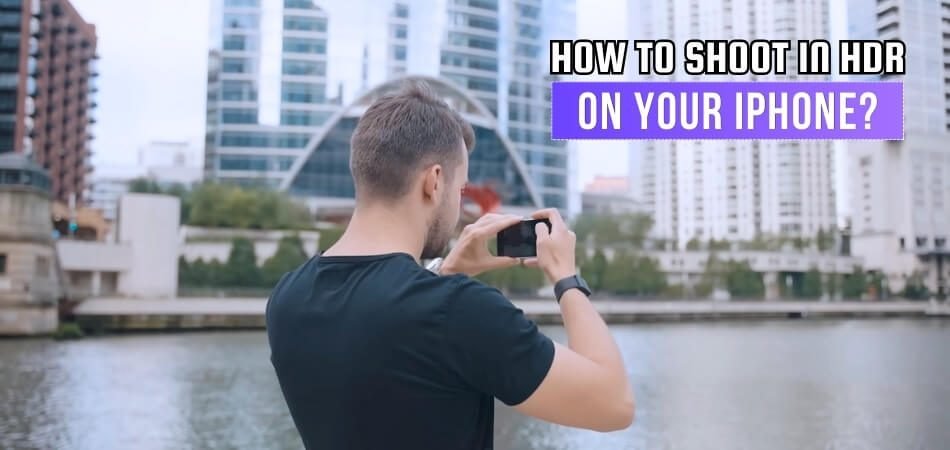
Mastering HDR on your iPhone can transform your photography, allowing you to capture images that pop with clarity and color. If you’re wondering “How to shoot in HDR on your iPhone?” Then you are in the Right Place.
Simply start with opening the Camera app and go to Settings to access HDR. Turn it on to enhance your photos in various lighting situations. Upon returning to the camera, select Photo mode, and make sure the HDR icon is on. Capture your photo as usual; your iPhone will automatically enhance the image’s contrast and color.
Keep reading to discover more tips and tricks for making the most of HDR photography on your iPhone.
Why Does HDR Matter in a Photo?
The High Dynamic Range technique enhances the quality of photographs by merging multiple shots at different exposures. The process captures a wider range of luminosity, resulting in images that are more similar to what the human eye sees. This allows photos to show vivid details in both bright and dark areas.

HDR is an invaluable tool when lighting conditions are challenging. It provides balanced images where traditional photography might result in overexposed or underexposed images. Detail enhancement and improved contrast are especially noticeable in scenes with significant differences in light and shadow.
This workflow is further enhanced by incorporating HDR photo editing services. These services optimize the brightness, contrast, and color saturation of the final image. As a result, HDR shots not only capture more detail but also appear more engaging and realistic.
Is HDR Suitable in All Circumstances?
No, HDR is not suitable in all circumstances. While it enhances many photos by balancing light and shadows, it isn’t always ideal. There are certain situations and subjects that might not benefit from HDR’s effect, so it’s important to know when and where to use it.
Fast-Moving Subjects
HDR requires taking multiple photos at different exposures, which takes time. Fast-moving subjects can appear blurred or ghost-like due to this delay. For action shots, a single, well-timed photo is often preferable. Thus, sports and wildlife photography usually do not benefit from HDR.
Low Light Environments
As HDR tries to amplify shadow details in dim lighting, it can introduce noise. This effect can degrade photo quality instead of improving it. Cameras struggle to capture enough light quickly in such settings, leading to less-than-ideal HDR results. Generally, a different approach might yield better outcomes in low light.
High-Contrast Scenes
Although HDR is designed to handle high contrast, extremely contrasting situations can still pose challenges. The technology might not always perfectly align and merge exposures, leading to unnatural halos around light sources. Such artifacts detract from the photo’s overall realism and appeal. Careful manual adjustments or alternative techniques might be necessary.
Consistency in Professional Shoots
Professional photographers often seek consistency across images. HDR can alter the look and feel of photos, making them stand out from others in a portfolio. This inconsistency can be undesirable in professional settings where uniform style is crucial.
Artistic Intent
HDR can sometimes override artistic intent. It may make a scene look surreal or less natural, which might not align with the photographer’s vision. Photographers must consider whether HDR will enhance or detract from the story they want to tell with their images.
How to Shoot in HDR on Your iPhone?
You can dramatically improve the quality of your iPhone photos if you shoot in HDR, especially when you are shooting in difficult lighting conditions. By combining multiple exposures into one image, HDR enhances both light and dark details. Here’s how to get the most out of your iPhone’s HDR feature:
Step 1: Enable HDR in Settings
Start by opening the Settings app on your iPhone. Scroll down and tap on Camera to access camera settings. Make sure the option for “Auto HDR” is turned on; this allows your iPhone to automatically use HDR when needed.
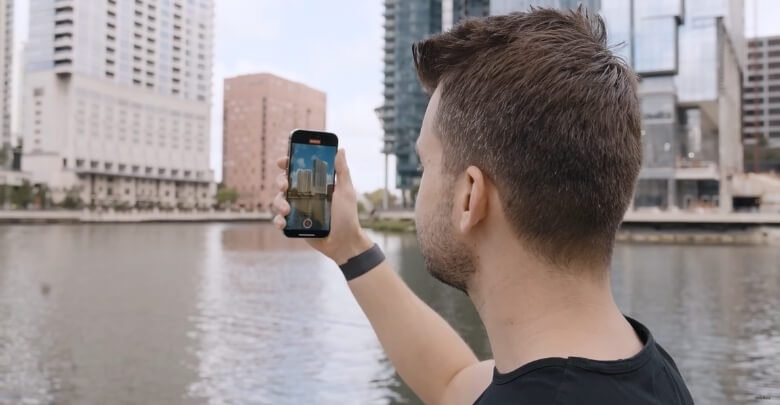
Step 2: Open the Camera App
Simply open your Camera app as you would for any photo. The interface is user-friendly and designed to make photography seamless and efficient. You don’t need to change modes if “Auto HDR” is enabled.
Step 3: Select Photo Mode
Make sure you are in photo mode. HDR works in this default mode and does not require special adjustments or manual modes. This ensures that HDR is automatically applied at the appropriate time.
Step 4: Frame Your Shot
Carefully frame your shot, paying attention to light and shadow areas. HDR works most effectively when there are significant contrasts in the scene that you want to balance. Take a moment to ensure everything looks as you intended.
Step 5: Capture Your Photo
Tap the shutter button to capture your photo. If HDR is needed, your iPhone will automatically take multiple shots at different exposures and combine them. You won’t notice this process; it happens instantly.
Step 6: Review Your Photo
The final step is to review the image in your Photos app. You should see an improvement in how the camera handles light and dark areas. The iPhone’s HDR feature makes it easy to capture professional-looking shots without manual editing.
Taking HDR Shoot with An iPhone – Why is It so Special?
HDR photography on an iPhone isn’t just a feature; it’s a transformative tool for enhancing image quality. It automatically adjusts photos to look more vibrant and true to life, especially in tricky lighting. This capability makes every shot not just a picture, but a potential masterpiece.
Enhanced Detail in Shadows and Highlights
HDR on the iPhone captures multiple exposures quickly. It blends these to highlight details in shadows and bright spots. This results in photos with balanced lighting and richer details. Your shots look clearer and more dynamic, mimicking human eye perception.
Automatic Adjustment for Optimal Results
The iPhone’s HDR mode automatically activates when needed. This smart feature saves time and simplifies your photography process. You don’t need to tweak settings; the phone handles it. Thus, even amateur photographers can easily capture professional-level images.
Improved Color Accuracy and Contrast
Colors in HDR photos appear more vibrant and true. This technology enhances contrast without losing natural tones. The result is strikingly vivid yet realistic images. This makes HDR ideal for capturing scenic photos and portraits.
User-Friendly Interface for All Skill Levels
Apple designed its HDR feature to be accessible to everyone. With no need for manual adjustments, it’s user-friendly. Whether you’re a seasoned photographer or a casual snapper, it works effortlessly. This inclusivity promotes creativity and experimentation among iPhone users.
HDR photography with an iPhone brings ordinary photos to extraordinary levels. Regardless of the conditions, everyone can capture stunning visuals with its easy-to-use interface and automatic enhancements.
Tips for Avoiding Common Issues When Shooting HDR on Your iPhone
Achieving the perfect balance between light and color is crucial when shooting HDR photos with your iPhone. Using this feature effectively can dramatically enhance your photos. The following tips will help you avoid HDR photography pitfalls:
- Stabilize Your iPhone: Ensure your iPhone is steady when capturing HDR photos to prevent blurring. Using a tripod or resting your device on a stable surface can help.
- Avoid Moving Subjects: Moving subjects can appear ghost-like in HDR images due to the multiple exposures taken. Try to capture still scenes or patiently wait for the right moment.
- Check Exposure Levels: Overexposure or underexposure can still occur in HDR mode. Adjust the exposure manually by tapping on the screen and sliding up or down.
- Mind the Lighting: Too much backlight or insufficient light can compromise HDR effects. Position yourself strategically to balance natural light.
- Keep HDR Auto Off Sometimes: For scenes with uniform lighting, turn off Auto HDR to prevent unnecessary processing. Manual control sometimes yields better results.
- Review and Edit: Always review your HDR photos; sometimes editing enhances them further. You can use apps like Lightroom to edit the HDR photo to adjust details that the iPhone’s HDR might have missed.
With HDR photography on your iPhone, you can make your photos pop with color and detail. Remember these tips to maximize the potential of HDR and achieve stunning, lifelike photographs.
Frequently Asked Questions About How To Shoot in HDR on Your iPhone?
Here are some of the FAQs and their relevant answers for a clear concept of how to shoot in HDR on your iPhone:
Can You Shoot HDR in RAW?
No, the iPhone’s native camera app does not support shooting HDR in RAW. HDR photos are automatically processed and saved as JPEGs.
How Do I Enable HDR on My iPhone?
Open the Camera app, tap on “HDR” at the top of the screen, and select “On.” HDR will be activated for your photos.
Can I Manually Adjust the HDR Settings on My iPhone?
No, the iPhone’s native camera app automatically adjusts HDR settings based on the scene and lighting conditions.
How Do I Know if My HDR Is Correct?
After taking an HDR photo, check the image preview. A well-executed HDR photo will have balanced exposure, detail in highlights and shadows, and natural colors.
Can I Edit HDR Photos on My iPhone?
Yes, you can edit HDR photos using the Photos app or third-party editing apps that support HDR images.
Does Shooting in HDR Drain the iPhone Battery Faster?
Yes, shooting in HDR requires more processing power and can drain the battery faster than normal photo shooting.
Should I Always Shoot in HDR Mode on My iPhone?
It depends on the scene. HDR is useful for high-contrast scenes where there are bright highlights and dark shadows. In other situations, it may not be necessary.
Conclusion
Our discussion highlighted the transformative impact of HDR photography on the iPhone, bringing professional-level detail and balance to your photos. This feature is particularly effective in contrasting light conditions, allowing every subtle nuance to be captured with precision.
Our study of “How to shoot in HDR on your iPhone?” reveals a time-tested, step-by-step method for harnessing this powerful feature, improving the dynamic range and overall appeal of your images. With these steps, you can easily improve your photography.
Getting the most out of HDR on your iPhone requires understanding when to use it and avoiding common pitfalls. Having this knowledge ensures that each photo you take captures a moment as well as displays it in the best light.