
Adobe Lightroom is a powerful photo editing tool in photographers’ arsenal, offering comprehensive features for editing and enhancing images. Its capabilities include nuanced editing of high-dynamic range (HDR) photos, a technique that breathes life into your pictures by capturing a broad spectrum of light and color. Wondering how to edit HDR photos in Lightroom?
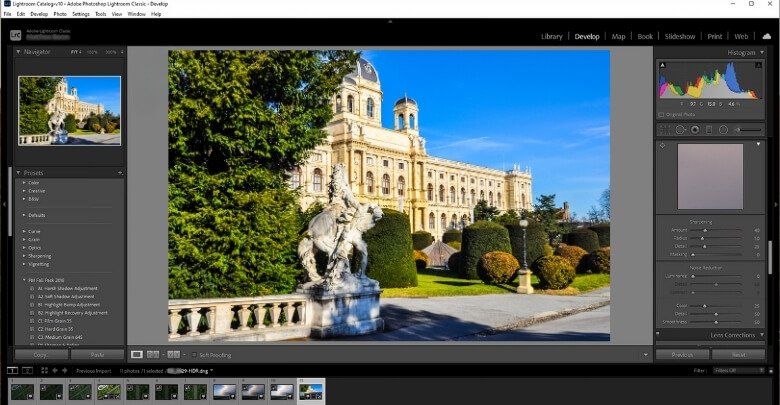
It’s simpler than you might think. By scrolling through Develop > Basics > HDR, you can unlock all the HDR-specific options, allowing you to tweak your images with precision. Moreover, setting HDR as your default mode via Edit > Preferences > Presets ensures every HDR photo receives this tailored treatment right from the start.
Are you curious to master HDR editing in Lightroom? Continue reading as we explore the tools and techniques that will elevate your photography to new heights.
How Does Lightroom Work?
Lightroom is like a digital darkroom, where your photos get a makeover. It organizes all your images neatly, making finding them a breeze. Plus, it’s equipped with tools to enhance colors, lighting, and more.
Imagine being able to adjust your photo’s look with just a few clicks. Lightroom offers sliders for tweaking exposure, contrast, and saturation. This means you can easily transform a dull photo into something spectacular.
But that’s not all; it also allows for local adjustments. With brushes and gradients, you can fine-tune specific areas of your image. Whether it’s brightening a face or enhancing a sky, Lightroom gives you control.
What Does the HDR Signify in a Photo?
HDR stands for High Dynamic Range, a technique that’s all about capturing more detail in your photographs. It combines multiple shots taken at different exposures. The result? A single photo that beautifully showcases both the brightest lights and the darkest shadows.

This method is perfect for scenes with a wide range of light levels, from sunlit landscapes to interiors lit by windows. Cameras or smartphones automatically process these multiple exposures into one HDR image. So, you get a picture that’s closer to what your eyes see.
The magic of HDR lies in its ability to bring out the textures and colors of your scene. It gives photos a rich, detailed look that’s hard to achieve with a single shot. In that case, choosing professional HDR photo editing is a smart move for photographers, as it can turn a good photo into an extraordinary one. For photographers, HDR is a tool that can truly enhance their craft.
How to Edit HDR Photos in Lightroom?
Editing HDR photos in Lightroom transforms your images, giving them a depth and clarity that’s hard to beat. You can bring out the best in your high dynamic range (HDR) photos with just a few steps, making them pop with detail and color. Here’s a step-by-step guide on how to edit HDR photos in Lightroom:
Step 1: Import Your Photos
Start by importing the bracketed photos you’ve taken for your HDR merge. In the Library module, click on “Import” and select the images from your device. This is your first step towards creating a stunning HDR image.
Step 2: Merge to HDR
Highlight the bracketed photos you imported, then right-click and choose “Photo Merge” followed by “HDR.” Lightroom will then merge these images, combining their range of exposures into one HDR photo. A dialog box will pop up, allowing you to tweak the merge settings before finalizing.
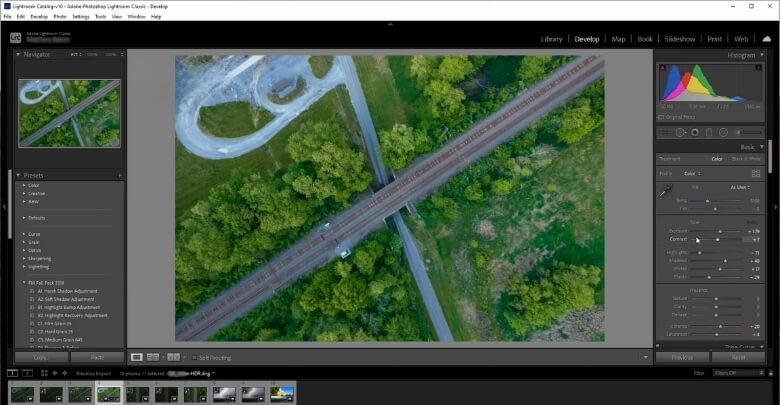
Step 3: Adjust the Basics
Once your photo is merged, move to the Develop module. Here, you’ll find sliders for exposure, contrast, highlights, and shadows. Adjust these to enhance the dynamic range further and bring out the details in your HDR photo.
Step 4: Fine-Tune Your Image
Dig deeper into editing by using selective adjustment tools like the Graduated Filter or the Adjustment Brush. These tools help you modify specific parts of your image, such as darkening the sky or brightening shadows, without affecting the whole picture.
Step 5: Enhance Colors
Go to the HSL/Color panel to tweak hues, saturation, and luminance. This step is crucial for making the colors in your HDR photo look natural yet vibrant.
Step 6: Apply Finishing Touches
Make sure you don’t forget to sharpen your image and reduce any noise. These final adjustments ensure your HDR photo looks crisp and clear.
Lightroom makes editing HDR photos easy, and it can improve your pictures a lot. Make your photos really stand out by merging multiple exposures and fine-tuning your edits. A great HDR photo isn’t just about capturing the right range of exposures, but also about blending and enhancing them afterward.
Considerable Factors While Editing Photos in Lightroom
You can transform your photos into works of art by editing them in Lightroom. However, to truly make your photos stand out, there are several key factors you should consider during the editing process. These factors help ensure that your final image looks both professional and visually appealing.
- Exposure and Contrast: Getting the right exposure is crucial; it sets the mood of your photo. Adjusting the contrast then defines the relationship between the dark and the light.
- Color Balance: Colors can make or break a photo. Pay close attention to your white balance to ensure colors look natural and true to life.
- Highlight and Shadow Details: Preserve details in your highlights and shadows. This balance is essential for maintaining depth and dimension in your image.
- Noise Reduction: High ISO settings can introduce noise. Use Lightroom’s noise reduction carefully to avoid losing important details.
- Sharpness and Clarity: Sharpening adds definition to your photo, while clarity brings out texture. Both should be used judiciously to avoid artificial-looking images.
- Lens Corrections: Correcting lens distortions and chromatic irregularities can significantly improve image quality. Always check this, especially for wide-angle shots.
- Crop and Composition: A thoughtful crop can dramatically improve your photo’s composition. Aim for balance and focus that enhances the photo’s story.
Benefits of Editing HDR Photos in Lightroom
The benefits of HDR photography with Lightroom are endless. This powerful editing tool offers features designed to enhance your photos’ dynamic range, making them more vivid and lifelike. Learning how to edit HDR photos in Lightroom can drastically improve your work, whether you’re an experienced photographer or just getting started.
Enhanced Dynamic Range
Editing HDR photos in Lightroom brings out the best in shadows and highlights. It merges multiple exposures, capturing detail in every part of the image. This results in photos with richer details and textures. Your images will display clarity and depth that are hard to achieve with single-exposure photography.
True-to-Life Colors
Lightroom’s color grading tools allow for precise control over the hues in your HDR images. You can adjust saturation and vibrance to make colors pop without looking artificial. This ensures your photos have a natural, true-to-life appearance. Achieving the perfect color balance enhances the overall mood of your images.
Noise Reduction
Combining multiple exposures can sometimes introduce noise, especially in low-light conditions. Lightroom offers advanced noise reduction features that maintain image quality. By fine-tuning these settings, you can reduce noise without sacrificing detail. Your HDR photos remain crisp and clear, even at high ISO settings.
Non-Destructive Editing
One of Lightroom’s greatest advantages is its non-destructive editing workflow. You can experiment with different edits without altering the original file. This means you can always go back and adjust your HDR photos as needed. It encourages creativity and exploration in editing without any permanent consequences.
Batch Processing
When working with multiple HDR images, Lightroom’s batch processing saves time and ensures consistency. You can apply the same set of edits to a group of photos. This is especially useful for projects with similar lighting conditions or themes. Batch processing maintains a uniform look across your entire HDR portfolio.
Easy Integration with Other Tools
Lightroom seamlessly integrates with Photoshop and other Adobe Creative Cloud applications. This flexibility allows for more complex edits that Lightroom alone might not support. You can easily transfer images between applications for detailed retouching. The integration streamlines your workflow, making it more efficient.
Editing HDR photos in Lightroom offers many benefits that can elevate your photography to new heights. From achieving stunning dynamic range and true-to-life colors to enjoying a non-destructive editing workflow, Lightroom empowers photographers to bring their visions to life. Embrace these advantages, and watch as your HDR photos transform into captivating art pieces.
FAQs about How to Edit HDR Photos in Lightroom?
Navigating the world of HDR photo editing in Lightroom can initially seem daunting. To help, we’ve compiled a list of frequently asked questions, providing you with straightforward answers that will enhance your editing skills and understanding.
Can I Edit HDR Photos in Lightroom Without Merging Them First?
Yes, you can edit single photos in Lightroom using HDR presets or manually adjusting settings to mimic HDR effects. However, merging multiple exposures will yield a true HDR image with a wider dynamic range.
What Are the Best Settings for Editing HDR Photos in Lightroom?
Start with adjusting the exposure, contrast, highlights, and shadows to enhance dynamic range. Use clarity and vibrance sparingly to add depth. Each photo is unique, so experiment with these settings to achieve your desired effect.
How Do I Reduce Noise in an HDR Photo in Lightroom?
In the Detail panel, use the Noise Reduction sliders. Start with Luminance noise reduction, adjusting the detail and contrast as needed. For color noise, adjust the Color slider until the noise is minimized without sacrificing detail.
What is the Importance of Tone Mapping in HDR Photo Editing?
Tone mapping adjusts the luminance of an HDR image, making it compatible with standard display devices. In Lightroom, this process is automated during the HDR merge, allowing for a balanced exposure across the image.
How Can I Enhance the Colors in My HDR Photos Using Lightroom?
Use the HSL/Color panel to selectively adjust the hue, saturation, and luminance of different colors. This allows for precise control over color balance, making your HDR photos vibrant yet natural-looking.
Is It Possible to Batch-edit HDR Photos in Lightroom?
Yes, you can apply edits to one HDR photo and then sync those settings across multiple photos using the “Sync Settings” option in the Develop module. This ensures consistency and saves time when editing similar HDR images.
Can I Use Presets for HDR Photo Editing in Lightroom?
Absolutely, Lightroom offers a variety of presets tailored for HDR editing. Applying these presets can provide a good starting point, which you can then fine-tune to match your specific vision for the photo.
Final Brief
HDR photo editing in Lightroom can transform your photographic work, elevating it from ordinary to extraordinary. With this tool, you can merge exposures and fine-tune colors so that your images capture the essence of the moment with unparalleled depth and vibrancy.
Gaining the ability to edit HDR images in Lightroom, knowing how to edit HDR photos in Lightroom, can revolutionize your photography and enable you to realize its whole potential. It’s not just about making images look better; it’s about redefining how you capture and present the world through your lens.
As you continue to explore and apply these techniques, your work will grow in quality and the impact it has on those who see it. Lightroom stands as an indispensable ally in this creative journey, guiding you toward realizing your vision in the most vivid ways possible.