
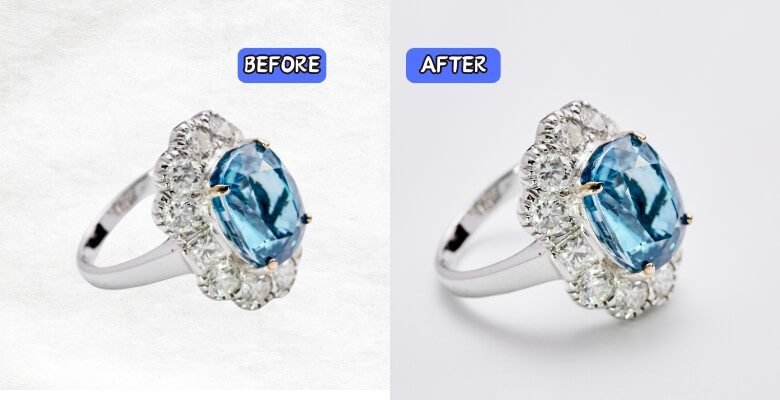
Professional photo editing is an essential component of jewelry photography, transforming well-taken photos into breathtaking showcases that capture the intricate beauty and sparkle of each piece. This detailed editing not only adds to the visual appeal but also significantly influences customer perception and can positively impact the overall brand image.
Photographers often face challenges such as capturing intricate details without losing sharpness, managing unwanted reflections, and maintaining true color fidelity. Here, we’ll explore “How to edit jewelry photos professionally?”
The process starts with setting up an optimal workspace and using the right equipment. Apply techniques for capturing high-quality images with proper lighting and composition.
Following the shoot, use advanced editing software to refine details, adjust colors, and eliminate blemishes. The process will take about 20-30 minutes per photo. Continue reading to discover more tips and tricks to master jewelry photo editing.
Professional Jewelry Photos Editing: Why is it Important?
Professional jewelry photo editing transcends beyond just making images look pretty; it’s a vital step in showcasing your products in the best light. When customers shop for jewelry, they’re not just buying a piece; they’re investing in what that piece represents, whether it’s luxury, love, or a personal milestone.
Stunning, well-edited photos showcase your jewelry’s craftsmanship, enticing customers and setting your brand apart. The clarity and detail that editing brings out in each photo can highlight the unique features of your jewelry.
Including the intricate settings and stones’ sparkle. This attention to detail helps build trust with potential buyers, showing them exactly what they’ll get. Additionally, enlisting the support of jewelry photo retouching services can be a game changer. These professionals use their expertise to overcome common challenges like unwanted reflections and color discrepancies.
As a result, every photo looks as good as the real thing. The jewelry industry relies heavily on professional editing, so investing in this service is not just a good idea, it’s essential to success.
How to Edit Jewelry Photos Professionally?
When you think about the sparkle and allure of jewelry in photos, you’re seeing the result of meticulous photo editing. The question “How to edit jewelry photos professionally?” might seem complex, but the essence lies in enhancing each image to ensure it looks as captivating online as it does in person.
Online stores need to improve jewelry photos with this kind of process, where the image serves as the primary representation of the product. High-quality editing captures the beauty of jewelry but also builds trust with potential buyers by presenting a polished and professional image.
Here are the steps to follow for a successful professional jewelry photo editing.
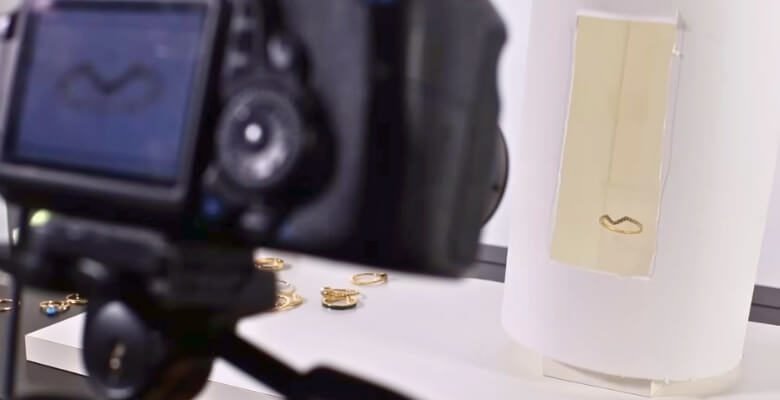
Step 1: Setup and Equipment
Before editing, the initial setup and the right equipment are fundamental. Ensure your workspace is well-organized and equipped with proper lighting. This could mean using softbox lights or ring lights to eliminate harsh shadows and highlight the jewelry’s brilliance. A high-resolution camera and a stable tripod also contribute to capturing fine details without blur.
Additionally, the background used during the shoot affects the editing process. A neutral, non-distracting background is preferable as it makes editing smoother. It allows the focus to remain on the jewelry, minimizing time spent removing unwanted elements later.
Step 2: Image Quality and Composition
The quality of the images you start with plays a significant role in the final outcome. High-resolution images make it easier to fine-tune details without losing clarity. Composition is equally significant; positioning your jewelry pieces strategically within the frame can reduce extensive cropping and repositioning in post-production.
When capturing your photos, pay attention to the angles and lighting, ensuring that each piece is shown at its most flattering angle. This helps reduce the amount of corrective work needed and preserves the originality of the photo during editing.
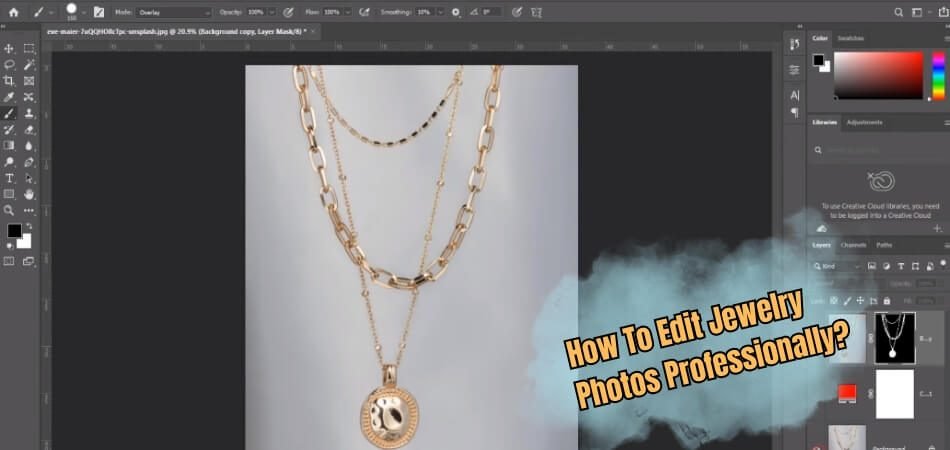
Step 3: Detail Refinement and Color Accuracy
Editing is where the magic happens. Enhancing details involves careful adjustments to sharpness and clarity to make every facet and engraving stand out. This process is delicate, as over-enhancing can lead to unnatural results. It’s about finding that sweet spot where jewelry looks both striking and real.
Color accuracy is also paramount. The colors of gemstones and metals must be true to life. This can involve adjusting saturation and hue levels to ensure that what customers see online closely matches what they will receive. This accuracy is essential not just for customer satisfaction but also for reducing returns due to unexpected color variations.
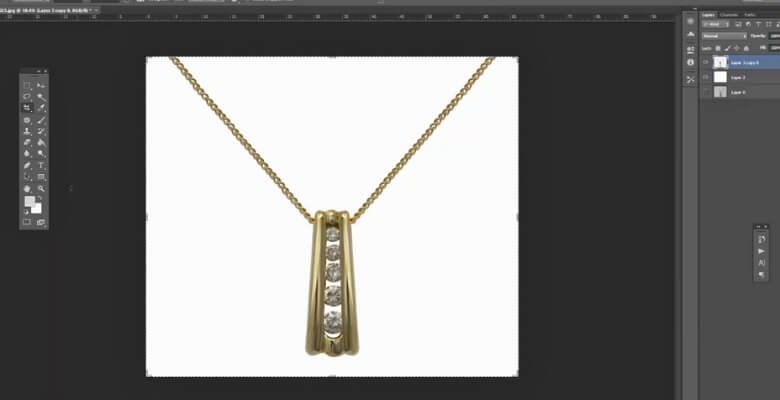
Step 4: Final Touches and Review
The final step involves removing any remaining imperfections such as fingerprints or dust visible on the jewelry. This polish helps achieve a flawless finish. Once the edits are done, always review the images on different devices and in various lighting conditions to ensure consistency across all platforms.
The key to transforming simple photographs into captivating, sales-ready images is to manage these aspects meticulously.
Troubleshooting Editing Challenges: What You Need to Know
The process of editing photos, especially for jewelry products, can seem like a puzzle at times. Each image presents its own set of challenges, and knowing how to troubleshoot these issues is key to maintaining your photographs’ quality and allure.
Let’s dive into some common editing challenges and explore effective ways to overcome them, ensuring your jewelry shots look flawless and professional.
Overcoming Overexposure
Overexposure occurs when too much light floods your photographs, washing out details that are essential for showcasing jewelry. To correct this, you can use the highlight adjustment tools in your editing software.
These tools help you recover details in the brightest parts of the image. It ensures that intricate designs and gemstone facets are clearly visible and appealing.
Tackling Color Inaccuracies
Sometimes the colors in your photos might not match the actual jewelry hues, which misleads customers. Utilize your editing software’s color correction features to adjust specific colors’ hue, saturation, and luminance.
A high level of precision is decisive for accurate representations of the true colors of the jewelry, which helps reduce returns and increase customer satisfaction.
Dealing with Reflections
Reflective surfaces on jewelry can create unwanted glare and reflections, obscuring details. To address this, you can selectively darken the affected areas or clone nearby textures to cover up glare.
In this way, the piece remains intact. This careful adjustment helps maintain the natural look of the jewelry while ensuring all details are visible and attractively presented.
Tips and Tricks for Enhancing Shine and Clarity of Jewelry Photos
The art of photographing jewelry can bring out its true brilliance. It’s all about making those gems and metals shine just right, so they grab the viewer’s attention.
Whether you’re a professional photographer or just starting, these straightforward tips and tricks will help you maximize the shine and clarity of your jewelry photos. This will make them truly stand out. Here are tips and tricks that will help you with the process.
- Use a Macro Lens: Capture intricate details clearly by shooting with a macro lens.
- Polish the Jewelry: Ensure each piece is polished before shooting to bring out its natural shine.
- Control Lighting: Use soft, diffused lighting to reduce harsh shadows and highlight details.
- Use a White Background: This helps reflect light back onto the jewelry, increasing its sparkle.
- Apply Selective Focus: Pay attention to parts of jewelry that are most important.
- Increase Contrast: Adjusting contrast can make jewelry features pop against the background.
- Utilize Post-Processing Software: Sharpen the image and maximize clarity during editing.
- Avoid Overexposure: Keep details intact by carefully managing exposure settings.
Through the use of these techniques in your jewelry photography, you’ll improve its visual appeal. In addition, you’ll better convey their quality and craftsmanship.
FAQs About How to Edit Jewelry Photos Professionally?
When editing jewelry photos, it’s extremely important to know not just the techniques but also the tools and processes involved. Here are some FAQs to guide you through the essentials.
What is the Best Photo Editor for Jewelry?
Adobe Photoshop is widely regarded as the most effective photo editor for jewelry. Bring out fine details and retouch images with robust tools.
What is Cad in Jewelry?
Computer-aided design (CAD) software helps create precise and intricate jewelry designs digitally, which can be previewed and adjusted before manufacturing.
Do Jewelry Designers Use Cad?
Yes, jewelry designers use CAD because it allows for precise and scalable designs, which are essential in jewelry making.
How to Design Jewelry For Beginners?
Beginners should start by sketching their ideas on paper, which helps in visualizing the design and making adjustments before creating the actual piece.
How Can I Reduce Noise in Jewelry Photos?
Use noise reduction tools in your photo editing software. Apply moderate settings to avoid making the image too soft, while preserving the fine details of the jewelry.
How Can I Enhance Gemstone Colors in Photos?
Adjust saturation and brightness settings in your photo editor. Be careful not to overdo it; the goal is to make the colors pop while keeping them realistic.
How to Correct White Balance in Jewelry Photos?
Use the white balance adjustment tool in your editing software. Select a neutral area in the image as a reference point to balance the colors accurately.
What Techniques Can Be Used to Remove Jewelry Reflections?
Utilize cloning and healing tools to manually reduce or remove unwanted reflections. This can help focus the viewer’s attention on the jewelry itself.
How to Ensure Sharp Jewelry Photos?
Increase sharpness during post-processing, but do it subtly to avoid unnatural edges. Ensure the focus is spot-on during the shoot for the highest quality results.
Final Verdict
Professional jewelry photo editing requires meticulous attention to detail and a deep understanding of photography and editing techniques. To master “How to edit jewelry photos professionally?” you need the right tools, like Adobe Photoshop.
Also, knowledge of techniques such as adjusting lighting, enhancing color accuracy, and managing reflections. It’s crucial to start with high-quality images, focusing on sharp, well-composed shots that highlight jewelry’s best features.
Additionally, always ensure that your edits enhance the natural beauty of the jewelry without making it look unnatural. These tips will help you achieve stunning, polished results that attract and engage viewers.