Have you ever looked at a photo and thought, “Wait, how did they even make that?” That is exactly what light painting photography ideas do to people. They stop the scroll. They make jaws drop. And the best part? You do not need a fancy studio to pull them off.
In fact, according to photography experts, light painting has been one of the fastest-growing creative techniques among both beginners and pros over the last few years. In 2026, it is only getting better, bolder, and more accessible.
Let me walk you through the most exciting ideas you can try right now.
What Is Light Painting Photography?
Light painting photography is a long exposure photography technique where you use a moving light source, like a flashlight or LED wand, to draw or “paint” light into a scene while your camera shutter stays open.
Think of it like drawing in the air with light. Your camera captures every stroke. The result looks like pure magic.
There are three core light painting photography techniques you should know:
- On-camera light source (light attached to or near the camera)
- Off-camera light source (you move the light around the subject)
- Kinetic light painting (camera or subject moves during the exposure)
Best Light Painting Photography Ideas to Try in 2026
1. Orbs and Geometric Shapes
This is one of the most popular creative light painting photo ideas right now. You spin a light source in a circle around a stationary subject to create a perfect glowing orb. It looks incredibly hard, but it is actually beginner-friendly.
Use a single LED on a string. Spin it fast and steady. Done.
2. Portrait Light Painting Photography
Portrait light painting photography is trending hard in 2026. You keep your subject still, use a long exposure, and trace light around them with a fiber-optic wand or flashlight.
The result? A glowing halo or dramatic outline around a real person. It is striking, personal, and unique.
3. Neon Light Painting Photography
Want ultra-vibrant, punchy images? Neon light painting photography uses colored LED tubes or gels over flashlights to create bold streaks of electric color.
This style works especially well for product shots and fashion photography.
4. Outdoor Light Painting at Night
Do not limit yourself to indoors. Outdoor light painting photography at night opens up a whole new world. Think abandoned buildings, open fields, or even city rooftops.
Pair this with light trail photography ideas by letting passing cars or sparklers add organic light streaks to your frame. The results are cinematic.
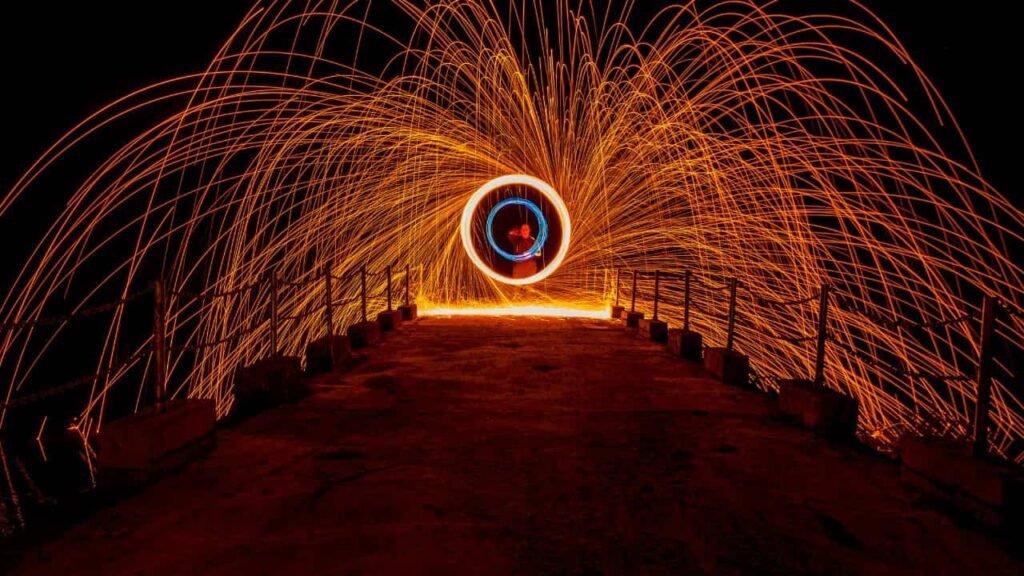
5. Steel Wool Spinning
This is dramatic, raw, and visually explosive. You light steel wool on fire, spin it in a circle, and capture the shower of sparks on a long exposure. Always do this safely, outdoors, away from dry grass or flammable surfaces.
6. Light Painting with a Phone
Yes, you read that right. Light painting photography with a phone is absolutely possible in 2026. Use your phone’s slow shutter or pro mode, set it on a tripod, and use the phone flashlight or a small LED as your light source.
No expensive gear needed.
Camera Settings That Actually Work
Getting your light painting camera settings right is everything. Here is a simple setup that works:
- ISO: 100 to 200 (keep it low to avoid grain)
- Aperture: f/8 to f/11
- Shutter Speed: 10 to 30 seconds (use Bulb mode for more control)
- Focus: Switch to manual focus. Autofocus does not work in the dark
- Tripod: Non-negotiable. Any camera shake ruins the shot
Best Tools for Light Painting Photography
You do not need a big budget. Here are the best light painting tools and brushes to start with:
- A basic flashlight or pen light
- LED light strips or tubes
- Fiber-optic wands (for soft, delicate streaks)
- Colored gels or filters over any light source
- A sturdy tripod and a remote shutter release
Want to go deeper into related techniques? Check out our guide to long-exposure photography ideas for more ways to use slow shutter speeds creatively.
Common Mistakes to Avoid
Even with great light painting photography for beginners guides, people still make these errors:
- Moving too slowly (creates blown-out highlights)
- Staying in one spot too long (you may appear as a ghost in the shot)
- Forgetting to dress in dark clothing if you want to stay invisible
- Using too many colors at once (less is more, especially early on)
Frequently Asked Questions
What camera settings do I need for light painting photography?
Use ISO 100-200, aperture f/8, and a shutter speed of 10-30 seconds. Always shoot in manual mode and switch to manual focus, since autofocus does not work in low light.
Can I do light painting photography with a smartphone?
Yes. Use your phone’s pro or manual mode, set it on a stable tripod, and use a long shutter speed of at least 10 seconds. A small LED flashlight works perfectly as your light source.
What is the best light source for light painting?
A simple LED flashlight, fiber-optic wand, or LED light painting tools and brushes are the most popular choices. Colored gels help you add vibrant tones without any editing.
Do I need to edit light painting photos?
Basic editing helps. Adjust contrast, blacks, and white balance in post. If you shoot in RAW format, you have much more control over the final look.
Is light painting photography hard for beginners?
Not at all. Start with simple shapes like lines or circles. Give yourself a full night to experiment. Most beginners get a good shot within the first hour of trying.